Sleepover Scrunchie - Knit Pattern
Disclaimer: This post contains some affiliate links. This means if you purchase through my link, I may receive a small commission at no extra cost to you. Thank you for supporting my blog in this way and helping me create more content!
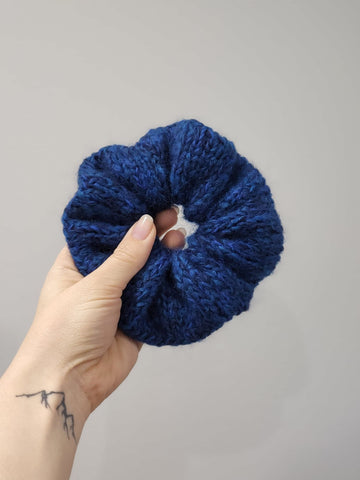
It is finally here!!! The Sleepover Scrunchie is a super fun little hair accessory design, with the vibes of a 90s sleepover party! I used Hobbii Metallico for this design and the metallic yarn just gives it such a cool look! You could use any other worsted weight yarn in place of Metallico, or even a combo of dk/mohair or multiple strands of fingering! I also knit up a sample in bulky yarn! I tested out two different seaming methods and will include both options in the pattern! The scrunchie size is adjustable too depending on your preference!
I hope you enjoy this free pattern! If you would like to purchase an ad free PDF copy of the pattern, it is available on Ravelry, Etsy and my website at a low price. Make sure to tag me on Instagram @perfectlyknotted and use the hashtag #SleepoverScrunchie so I can see what you make! You may sell finished items but please credit Perfectly Knotted as the designer. Selling or distributing this written pattern as your own is a violation of copyright and will not be tolerated.
Materials
- 4.5 mm (US 7) 16 inch circular knitting needles (may need other size needles to meet gauge)
- ~15-25 grams / 38-65 yards of worsted weight (4) yarn. Click here to check out Hobbii Metallico. KnitPicks Swish Worsted is another great option.
- Elastic Hair Tie (I recommend using a hair tie like the Goody Ouchless 4 mm Hair Ties)
- Scissors
- Measuring tool
- Tapestry needle
Size
This pattern makes a scrunchie that is approximately 4-5” (10-12.5 cm) in diameter. Size can easily be adjusted by altering the CO stitch count and length.
Abbreviations
st(s) stitch(es)
BOR beginning of round
k knit
p purl
RS right side of work
WS wrong side of work
Gauge
In stockinette, in the round, blocked
1” x 1” (2.5 x 2.5 cm) = ~4.5 sts x 7 rows
Note: Gauge is not super important for this design, as the sizing of the finished items does not need to be exact. I recommend using a needle size that will get you fairly close to this gauge, but you can also add extra sts/rows to alter the size.
Tips
- Keep track of row counts and any sizing modifications so that you can replicate it if you make more!
- I use a digital row counter to keep track of my rows.
- This design has two options for seaming, one with a whip stitch seam and the other as a modified three needle bind off. Depending on which seaming method you plan to use, you will want to start with more or less yarn for your cast on tail! Read ahead to check out the seaming instructions if you aren’t sure which you would like to use!
- If you have thinner/shorter hair, you may want to make your scrunchie on the smaller end so it is not too bulky and overwhelming!
Pattern
To purchase an ad free PDF copy of this pattern, click here!
Scrunchie Pattern
Using the Long Tail Cast On (or any other preferred cast on method), cast on 90 stitches. Join in the round, making sure not to twist your stitches, and place a BOR marker.
(For a less full scrunchie, cast on 80-85 stitches. For a fuller scrunchie, cast on 95-100 stitches. My samples all used 90 stitches.)
If you plan to use the whip stitch seaming method, start with ~100 inches of tail when you begin your long tail cast on, which will leave you a good amount of yarn leftover as the tail for seaming.
Note: To modify the pattern to use bulky yarn, cast on 70-75 stitches, and follow the same length and seaming instructions! I recommend Hobbii Diablo Multi or KnitPicks Wonderfluff for a lightweight, soft, fuzzy scrunchie in bulky yarn!)
Round 1: k all
Repeat Round 1 until your length measures 3-4 inches.
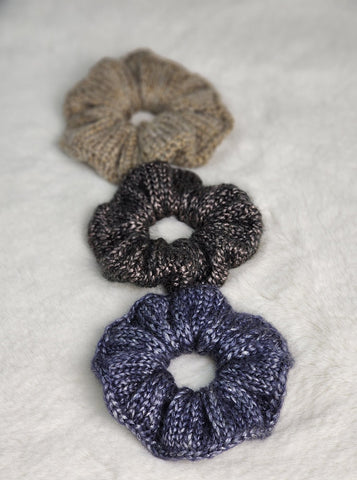
For the smallest scrunchie (blackish bronze - middle) I knit to about 3 inches. For my mid size scrunchie (silvery blue - bottom) I knit to about 3.5 inches. For my largest scrunchie (gold - top) I knit to 4 inches. Feel free to customize the length you knit, just keep in mind that the scrunchie may not sit the same as in the photos if it is too much smaller or larger than my samples.
Seaming Method A: Whip Stitch

Bind off all stitches knitwise. I recommend either binding off fairly loosely or using a stretchy bind off. You will now have a short tube. Turn it inside out so the WS is facing out. Place your elastic around the middle and fold the top and bottom around the elastic (WS facing in to each other, RS facing out). You will now use the tail from your cast on and whip stitch the cast on and bind off edges together. When stitching the seam you will insert your needle into the outer loops from the cast on edge and the bind off edge. This will create a seam that is nearly invisible. Weave in your ends.
*Note: make sure your stitches are lined up when you start seaming otherwise the scrunchie will be a bit twisted.
Seaming Method B: Modified 3 Needle Bind Off
Holding your work with the RS facing you, place the elastic behind the work (touching the WS) and fold the cast on edge up behind the elastic tie (encasing the elastic between the two folds of the knit tube).
Set up: Place a loop from the first cast on stitch onto your left needle. Knit that stitch together with the first live stitch from your last knit round. Repeat with the next stitch. You now have two stitches on your right needle. Bind off one stitch.
Step 1: Pick up the next cast on stitch and knit it together with the next live stitch.
Step 2: Bind off one stitch.
Repeat these two steps until you have bound off all your stitches. Cut yarn, leaving a 6” tail, and weave through the first bind off stitch to join the seam. This will create a visible seam with a nice clean edge. Weave in your ends.
(Blackish bronze and gold scrunchies use Seaming Method A, silvery blue scrunchie uses Seaming Method B)
Thanks for knitting with me! I can’t wait to see what colours/yarn you choose to make your scrunchies!
Remember to tag me on Instagram @perfectlyknotted and use the hashtags #SleepoverScrunchie so I can see what you make!
Make sure to save this post and pin it for later!